Showing posts with label hair. Show all posts

Covering Up My Grey Hair


I don't make a secret of the fact I'm in my thirties, I'm thirty three to be exact and usually if you have dark hair you may notice a few grey hairs beginning to creep in around this age. I however am not most people and due to the fabulous genetics of my parents, inherited a grey streak at the front of my head at the ripe old age of thirteen. No it wasn't cool, no I didn't feel like Rouge from X men it just made me stand out and as a kid who was already being bullied I really didn't want to stand out. So I began dying it, month after month, year after year and than more time pasted and more grey came. Sadly I'm not fully grey, as I could dye it super bright again. Instead it's a patchy mess, and if I don't dye it I look like I have a massive bald patch. 
1

Dying Hothair Extensions : Pink Into Purple


5 piece hair extensions: Hot Hair*


The other day I sadly had to bin my faithful extensions, as they had reached the end of there life and been worn to death. I usually wear extensions non stop or not at all, and as I've been missing long hair I have been looking at invest in some new ones. The ones I had before where pretty cheap and they did hold up but were really thin. 

The nice folks from Hothair asked if I would like to review a pack of theirs, so I did a little dance around my room at the knowledge I would soon have a mane of hair once again. This is the five pack, so great for styling a ponytail, plait and wearing your hair on one side. If you want a full head than you will need another pack or go for the 10 piece. If you hair is longer it will blend easily, but if you have a shorter length like mind you will need the extra hair so it doesn't have gaps. I'll be showing you next week, how I style my hair using the 5 piece pack to give some ideas. 

Today I want to show you how I dyed mine to blend in with my hair (pink into purple), if you have dark hair than you can still do this just add a darker shade at the top to blend with your natural colour for some fun pop of hair colour. The extensions come in really nice packaging, and the instructions on how to pop them in are easy and clear. There is also instructions on how to care for them, so follow those careful so you don't damage them and you get a lot more life out of them.  
3

How I Got Rainbow Hair


As promised I'm taking you on my hair colour journey, and as you may have seen I dyed my hair rainbow colours. There's no set way on doing this, as there are so many ways to dye the hair believe it or not. I wanted a rainbow mix, rather than colour blending over where the colours fit together in a colour wheel. I decided to take chunky sections of the hair, as you will find topping up hair dye a lot easier than small tricky sections. So as always step one is the same, reach for that bleach. 
3

How I Got My Colour Banding (Tie Dye Effect)


If you read my blog all the time, you will know I love to dye my hair my latest is this blue into purple and pink tie dye effect using the colour banding method. I would have liked to have more pink in the middle, but sadly I run out so first thing is make sure you have enough product to cover your hair or you will have to mix in another dye. Saying that for my first try at this style of dying, I usually do doped ends or section colour like in this post I kinda like it. As I tend to get a bunch of questions of what I used and how I did it, I thought that every time I change colour I'd write a post on either tips or just what colours I used. It's great for me to as I can use it as trail and error and also for colour play as sometimes I forget what combination of dyes I've used. So lets begin. 
0

Learning More About Hair Colour With Bleach London


As someone who changes hair colour, as often as I change shoes I would say I've learn a thing or two about hair colouring. Yes I learnt the hard way making mistakes with both bleaching, and on getting the right shade and tone for my many hair colours. So there's always room to pick up new tips and to get the best possible hair colour. Those tips are even better when they come from Alex and Sam (co-founders of Bleach). 


  • Get inspired: What colour do I go for? What will suit me? Bleach have all the inspiration you need, with regularly updated Lookbooks on their site and daily peeks at customers hair do's over on their Instagram your question won't be what will suit me, rather which should I try first. If your new to hair colour why not go for pastel (this seasons hair trend) if you have every colour going than why not try rainbow. The possibilities are endless and with so many how to's floating around the internet, just go for it.

  • Bleaching at home: I was chatting with Alex and saying that maybe if I used foils while bleaching, maybe I would get better results. She said you can but they don't use them at Bleach, she said that as long as you mix it well and start from the front and work your way back (roots first, than the rest) and leave it on for the recommend time it will work just as well. 
  • Colour on your skin:  Coat your hairline, ears and neck with vaseline, lip balm or conditioner this well stop hair colouring your skin. If you do get colour on your skin, use makeup remover and the colour should go. Use an old towel for covering shoulders and wear old clothing when dying. Also if your messy put down some newspaper/ old towel on the floor to stop you destroying your bathroom floor.

  • Getting even coverage: As shown below if you have long hair, adding the colour in sections and than twisting helps with making sure the hair is evenly coloured (great for dip dye). If your doing a full head of dye, just like with bleaching do roots first and work down the lengths of hair. 

  • Keeping colour bright: If you have one colour in your hair, add some dye into your  conditioner bottle a couple of tablespoons shake to mix it and than next time you wash your hair leave your condition in for a while after shampooing.


1

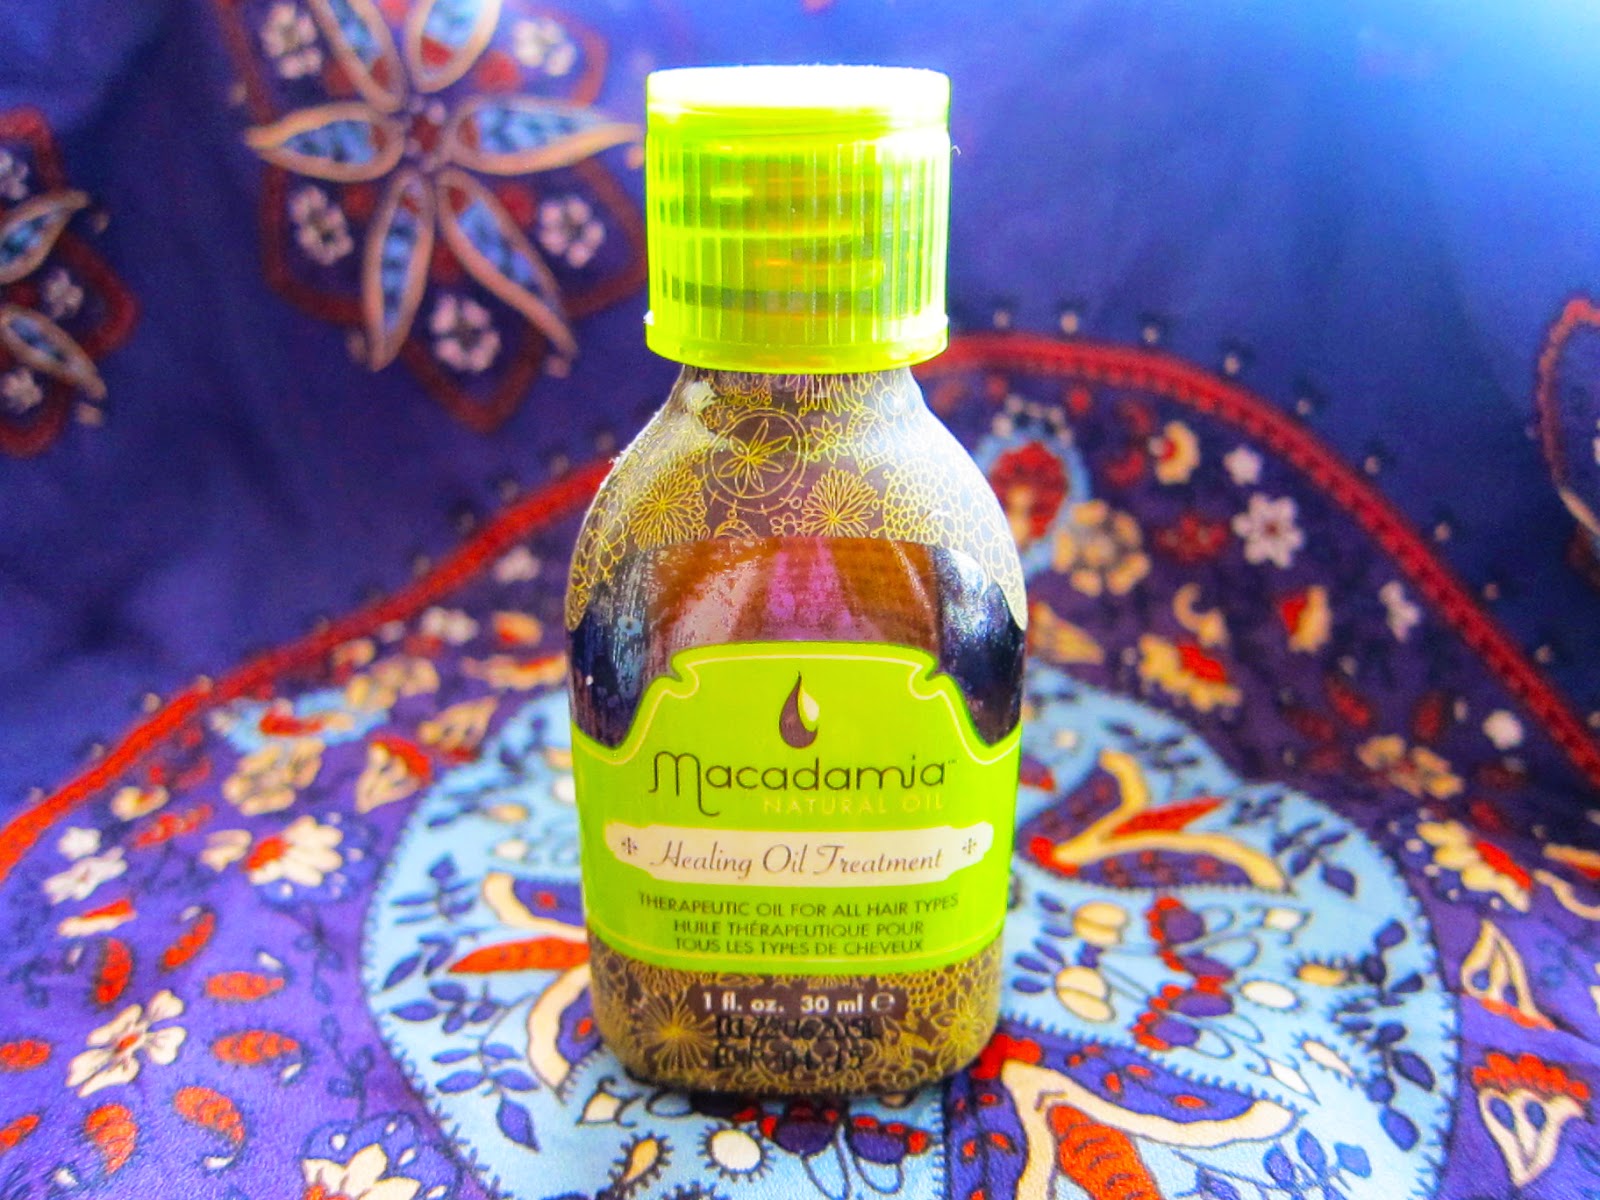
Macadamia: Healing Oil Treatment


As someone who loves her alternative coloured hair, I loathe how dry bleaching can leave it. Sadly if you want bright colourful hair, you have to use bleach unless your a natural blonde (why am I not a natural blonde *cries into laptop). As well as using hair masks, I asked some of my fellow bloggers what I could use during the day. Everyone said to use hair oil, and give me a ton of different ones to try. I ended up buying a couple, but I just always go back to the Macadamia healing oil. Firstly it smells like a perfume I wore in my early twenties, Angle by Thierry Mugler which I still love. 

I usually run this through my hair when it's still wet, than let it dry natural as I've been avoiding heated tools to give my hair a break. If I'm having a really bad hair day, I'll rub some in my hands to heat it slightly and apply it to just the ends (don't pour heaps on, a little at a time is best). It really helps to soften your hair, from when it's looking a bit wiry. You can also rub it all over and into your scalp, but use your fingers not your palms as this apparently causes damage. I steam my hair once a week, by covering my hair in oil than wrap a heated towel around my head as this helps the oils to absorb. I've done to saved my hair from needing the chop, and it's dramatic improved it's condition.  I usually leave it on for around 10-15 minutes.

This bottle has lasted me ages this is the medium one at 30ml, as like I said unless your steaming your hair all over I just tend to use it in my ends. I love the smell and it's never sticky. I would recommend this for anyone who has really dry hair, you can use it if you have oil hair but too much oils extracts more dirt to it. Maybe use it every now and than, just to boost hair strength and shine. Even on fine hair this would work well as it's doesn't weight the hair down and it's nice and gentle. I would  however avoid this if your not a fan of the scent of sandalwood, and of course if you have a nut allergy it's best to avoid. 

Macadamia Healing Oil Treatment available from Beautybay at £5.59 for a 30ml and £24.41 for a 300ml with pump bottle ( they are on offer). 


1

How I Got My Pastel 'Mermaid' Locks


So after asking you lovely lot on twitter what eye looks you wanted to see, you all seemed way more interested in how I got this hair. It's really easy and looks like you have put it far more effect than you actual have. So firstly you should know same facts, will you need to bleach your hair if your not already light blonde? Yes. Will it damage your hair? Yes, but using a lower vol of peroxide and bleaching over a longer period of time will lessen the damage. If you are really scared go to the hair dresser and get them to bleach it for you, because once's that's done you can apply the colour yourself. So here's how I do my hair, hope it helps and if you have any other questions I'm happy to answer just leave me a comment.


6

Bleach London: Home Hair Dye Launch


To mark the launch of their home hair dyes (available from Boots), Bleach London invited  bloggers to come try out and pick up some tips at their salon in Topshop Oxford circus. We were treated to cupcakes from Lola's cupcakes, while we had a good nose at their amazing colour range. It was so great to be invited by Chalk PR, and even see Emma (the boss) have her hair dyed my kind of boss. I was expecting it to be a presentation, but it was far better bloggers where trying the product than and there, from dip dye to rainbow locks

I chatted with both Alex Brownsell and Sam Teasdale (co-founders of Bleach London) who gave me great tips, which I'll be sharing in my next post along with the results of people who had their hair dyed. Just like Alex and Sam, Bleach has a very relaxed but uber cool vibe.  I'm serious for two ladies have made their dream a successful business, but are so down to earth and hands on. The back wall has bottles filled with mixed dyes and ponies, it's how I picture my dream bathroom. They have coloured extensions hanging up on the wall as you enter inside, with all the names of their dyes just below so you can see just how beautiful the dyes look on hair. Saying that you need a good base, as colouring your hair is like painting a canvas the whiter the better for colours to keep their true shade. 

I was chatting with Alex about how I dye my hair, I told her that I didn't use foils when bleaching. She said don't worry neither do we, as long as you follow instructions and mix it and leave it on for the recommend time it's fine. Again I love that it's like going to your friends house to have your hair done, but instead of a patchy mess they leave you with ridiculously mesmerising hair. The team work really hard and work well together, they are more like family. Above the chairs where they dye and style the hair, are photos with a mass of inspiration for trying something new. The wash basins are massive and I love seeing them wash out the hair as the excess colours disappear down the plug hole.

The event was so much fun, and it made my day when a lady asked if I worked there *dream job. Massive thanks to Bleach, Chalk PR and Hayley for inviting me. In my next post, like I said I'll be sharing tips for home hair dye and showing you results from bloggers that had their hair dyed. After the event me and my blog babes Lauren, AmyGeorgia, Robyn, Sara, Plum all went for a drink and were chatting about our next hair adventures. We all had such a great time, and I'm looking forward to seeing their hair colours.
6

Dear Diary I Need: Chloe Norgaard's Hair


Sources: 1/ 2/ 3/ 4/ 5

11

Decolour Stripper Review: Plus How To Strip Your Hair

So before I recoloured my hair, I really needed to strip the colours out (just the dip dyed ends) as after a while they get really dull plus because I dye my roots darker the brown starts to make it's way down my hair and my colours look less vibrant. The only thing is that stripping your hair really weakens it, so when asked if I would like to try Decolour - A stripper that was gentle I though 'bring it'. 

It's really important to read the instructions, so don't be tempted to skip them and assume things. I've learned the hard way in the past with products, so now make sure I have a good read get set up than apply the product. So first thing to do is make sure you have an old t-shirt on, you don't want to damage your clothing. I have a couple of tops I keep that are used for dying my hair, note it's tie dye effect haha. 


Step One: Make sure your hair is clarified -you do this by cleansing the hair with a sulphate free shampoo to remove conditioning residue and styling products. Leave the hair damp. Take Part 1, the power and make sure you mix well with Part 2 the developing cream. Make sure you have no lumps or the product will not work effectively. 


Step Two: Work from the mid section down in the hair. As your roots should always be the last section, as they will have less colour build up. work the cream into the hair until it's completely covered both on top, and under.  Use a brush just to run through your hair, if it's long like mine you can miss bits and you don't want patchy hair.There's no ammonia in this, so I found the smell was not as harsh as other products I've used in the past.

Step Three: Check developing time, it states how long for different hair colour. I didn't leave mine on long, as I knew the colour would lift quickly. Once the time is up, rinse the product out. Than apply the conclude balm, this will help normalise the hair and leave it easier to manage. Than rinse and than you can recolour right away. 


Overall I was impress with this stripper, it did the job but my hair didn't feel as weak as it does with past strippers I've used. I think it was pretty great considering how much damage I have from bleach to the ends of my hair (it's like straw). It's a great way of getting rid of built up colour, and if your trying to change the colour of your hair it's a great option. Bleach is really harsh and can melt your hair, plus you have the fumes. This is a little smelly, but it's not as harsh. Once my hair is in better condition I will be using this all over, as I've tortured my hair a lot lately i need to let it rest.


6

Hair Trend 2013: The Undercut

As you know I have dip dyed hair, and if your a new reader well yeah I have dip dyed hair. Of cousre it's been a massive trend and so now everyone and their dog has dip dyed hair. So where do we go from here? What are all the cool kids doing? By cool kids I refer to blog friends who have cool style and usually do something before it becomes the norm.
Well before writing this, I've been looking to what people have been doing with their hair, and it seems everyone is going for an undercut (by everyone again I mean peeps who do it because they love it, not because it's trendy). I actually really want to do it to mine, but sadly my hair is so thin and it would just look like I was shaving my arm pits on an early morning and some how ended up with half a head of hair.

Now I'm not saying that the undercut is a new trend, as I think my mum had one in the 80's when she was a punk. But it is one that people go back to, you feel a certain power when you take a 'risk' with your hair. It's something you do for you, and most people will tell you there's a sense of freedom. Also I would just like to add in that Grimes has one NOW. I love her music and her laid back style, but yeah you can usually spot one on a celeb who is rocking it (and some who well, couldn't  rock a full head of hair let alone an undercut..anyway).

Famous Babes Rocking The Undercut


Blogging Babes Rocking The Undercut

Photo credit: Lyzi, Ella, Kate

Lyzi from Being Little:
Lyzi I would say is more a lifestyle blogger, but like me she shows you her personal style, beauty and takes you on her mini adventures (they are always amazing). I'm not sure if Lyzi still has her undercut, but when she posted  the photo above on her  instagram I fell in love (note thee amazing cupcake tattoo) I love that she kept a lot of hair above and that she got it so straight at the back. Lyzi is also an artist and has a shop, her cat illustrations are super adorable.


Ella from Ella Masters:

Ella's written about when she first took the plunge here, so have a read. Ella like myself had bleaching woes (yeah thanks dip dyed hair)and felt that her hair just needed cutting, I really love her undercut and if I had her thick lush hair I'd be shaving while typing! Ella  is an artist and you should check out her shop, she's very talented and I love her sailor man illustration.

Kate from This Is What I Do:

Kate actual now has a shaven head, and looks stunning check her out over on her blog. I think Kate rocked the undercut and I loved the many ways she use to style her hair, she has a You Tube channel to check out too. She's a busy lady as she also runs Skullduggery, which has really groovy sweater and hats (perfect for teaming with your new undercut).


I don't know if there is a link between being creative and your hair, who knows. What I do know is I love the undercut, and these gals show you should just go for it. Have you spotted any hair trends? Do you think the dip dye is here to stay? 

3

GHD Style & Protect Gift Set

I think ghd is a brand that has a cult following, it's one of those rare brands that you know if your getting some as a gift you can be happy and even excited. This said it's always nice to know that a brand really is living up to it's name. The folks at Best British Bloggers did just that by asking me to review some, so here I'm going to see if the 'ghd Style & Protect gift sets' can tame my 'dry as a bone' bush like hair. This is going to be a challenge!


ghd gift set* Best British bloggers

I love the box the products come in, it's also totally wrap friendly I think if I was buying this for my mum, or a friend it would be easy and not a mission to wrap (perfect for us who are not gifted in the wrapping department). It also protects the sprays from getting damaged, I've kept it for storing bits in so that got bonus points from me I hate overkill on packaging.

Products- 
  • Paddle Hair brush- I know a lot of people will say a brush is a brush, this is not true usually my other brushes tend to have a tough time getting through my dry knots in my hair. This didn't, it's got a little weight to it but my hair was brushed and ready to style quickly. I like that at the bottom it has the 'ghd' too, simple but cute. 
  • Hair clips- Yeah can't rave about hair grips/clips they do the job, and are always great if you have a fringe. I think I will use these and the brush the most, as these come in handy for when I did my makeup too. Don't know about you, but foundation in my hair is no fun to remove.


  • Hair Spray Straight & Smooth- This comes out like a sprites rather than a spray, it wets the hair and does have a nice smell but not overpowering. I would recommend using it more at the ends of the hair, rather than towards the scalp. I don't think this product a lone well smooth your hair, it's design to help when styling so I used it when blow drying my hair out to get it really sleek. I did notice my hair had a softer finish and didn't look as dry as it usually does, my hair is in need of a cut as my ends are so bad but I think this is great as a quick fix. It didn't get rid of the dry ends all together, but worked better than some of the other smoothing sprays I have used in the past- Also it's not sticky like a lot of sprays.    
  • Hair Spray Final Shine- This is a finishing spray and again it's not sticky and has a nice smell. I did notice that my hair looked more glossy and healthy, rather than it's usually dull and lifeless self. I think I will use this on it's own too, great for when I roll out out of bed and have zero time to do anything with it.  
                                               my hair two day's after styling with products.

Over all- 
I really liked this gift set, it's simple but I think it's something a lot of women will use. I think with Christmas around the corner, I can see this being a great present for many and it's a great gift for a girl who has everything. Price wise it's a little pricey personal I think at £39.00, but it is ghd so I think you know it's more up market and the product sprays are worth it. Also it's well presented, when I received it the box had me smiling before even trying anything. I'd give this an 8/10 this is based overall. Thank you Best British Bloggers, anything that helps tame this mane is a winner.

4

Get Savvy: A Guide On How To Dip Dye Pre Dyed Dark Hair

So after spending a silly amount of hours on the Internet, searching for help with getting my pre dyed dark hair to dip dye colour I found there were none! Apart from the odd video's on Youtube that were not very clear, so adding on to my guide to dip dye hair, here is one for if you have pre dyed dark hair. So if you follow me on twitter you would have been following my progress, so this guide has been written based on my journey (trail and error) on getting FINALLY to dip dyed hair. Before you start know that this is no quick process, but if you want it bad enough than read on. (please note I am not a hairdresser, I strongly recommend going to the hairdressers to have this done I wish I had. It's up to you anyway ...)

My hair before bleaching, with my dyed dark brown/black hair

After the first lot of bleach, (I apply it after dying my roots dark, so missed heaps: note, do bleaching on it's own so you don't miss bits).


This was the second time I bleached my hair, like I said I didn't have enough and so the back come out really weak.


Things you will need:
Brushfor sectioning your hair.
Gloves, these usual come with hair dye/Colour B4 but if not make sure you wear some as you don't want dip dye hands. Plus bleach will irate the skin.
Colour B4, or a product to strip your previous colour.
Get a dying hair kit, I got mine off EBay. You can reuse it again, and again and the brushes are great. Make sure after any dye/bleach you use, you wash your bowl and brushes!
Bin bag, (or an old tee shirt if you have one) cut a whole in the top for your head to go through this why you won't get dye on yourself and you won't need to destroy your towel. Plus a small bag to bag your hair (you can use a small grip in hold the bag around your hair.(don't get a highlighter kit they don't contain enough product). 
Pre lighter/ Bleach, Loreal & stargazer and most other brands have heaps for blonde hair. Basically you need to bleach the ends of your hair first (as if you were just going to have Ombre hair), this will help the coloured dye take to your hair and also make it vibrate a must for really dark hair. 
Cling film/foil, this will be to use once the dye is on to stop it from going everywhere.
Coloured Dyealternative shops are great for picking up crazy colours like pinks, blues etc.
Here are some stores that sale great coloured dyes:
Manic Panic
Directions
Sallys

Preparation:
Firstly this will take you a few weeks, you need to rest your hair in between different treatments. If you rush it you won't get as much colour. I rushed mine, now I have to wait a month, so that I can re-bleach and add colour again. Take your time, the results will be worth it, also do strand tests! Buy a hair stripper, if your in the UK we have a product called Colour B4  you may have to do this twice. It will leave a great base as it rids your hair of colour, it will be dry and feel weak so let it rest. If you have had black or brown dyed hair, it will go to a orange/rust type colour. Follow directions on the pack 100% for best result.


  • Once you have an old tee on or a bin bag, start to section your hair up, start with hair underneath and pile the rest of your hair on top than you can let it down when you need to apply (makes it a lot easier).
  • Next follow the direction and mix up your Colour B4, you can either apply it from a bowl with a brush or just use your hand with the nozzle. Leave Colour B4 in for the time stated, I wrapped mine up with foil and bagged it (it works best when warm).
  • You must rinse your hair for the time stated, and than shampoo with the buffer, rinse again and shampoo with the buffer again apply and rinse.
  • Towel dry your hair, if it's light enough you can apply your dye I used Directions Turquoise , it's a really good semi permanent colour, they have a heap of different ones to choose from. If it is still too dark you will need to leave your hair to rest for 3 weeks at least before bleaching it.
  • If it still isn't bright enough, now you can bleach it but you must leave your hair for at least 3 weeks after stripping it, let your hair rest ( if you do use Colour B4). As your hair needs to rest, or it will break and yes you will damage your hair dip dying it, but you can minimise it as much as you can. Shampoo your hair with toner shampoo, to help lose the brassy colour giving you lighter hair to dye. 
  • Follow directions on the pack 100%, and don't leave it on longer than the recommend time as it doesn't work beyond that and you will just be causing damage. If your hair is still dark than again you will need to bleach it, I found after two weeks mine was fine. Do the strand test! Just to check. 
If you need to bleach after Colour B4 (you must wait 3 weeks):
  1. Once you are covered with your bin bag or towel, put on your gloves and start to mix the bleach according to the instructions.
  2. Section your hair with your brush, and at the ends apply the bleach evenly (you can go as wide with the dip as you like, or just have a little at the ends of your hair).
  3. Bag your hair, this will stop mess and help dye develop. Wait for 40-45 mins to let the bleach work (double check instructions as it may vary), as dark hair takes a while. 
  4. Rinse out the bleach by shampooing lightly. I a toner shampoo (this will remove brassy colour) I used Sheer blonde toner shampoo by John Frieda   and towel dry your hair.
  5. Apply your coloured dye and wrap in foil. Start by taking a square of foil, fold both sides inwards than start folding the foil upwards to keep the dye covered and help it develop.
  6. Apply heat by blow drying, I left my Directions dye on for a hour, this will give you a much stronger colour.
  7. Wipe off any excess dye, reapply and wait if needed (you can make the colour as strong or as faded as you desire) when your done just rinse. Do Not Shampoo the colour out! Just rinse and condition if you wish.
Note: If you want your chosen colour to be lighter mix in some condition into it.

Things to avoid:

  • Bleach the hell out of your hair, after doing mind twice I realised that I should have stripped it first. As you can see from the photo's it did lift some of the colour, but not enough to put the coloured dye on. Because of this it's taken me forever to even get a little dip dye colour!
  • Moaning that you are going to damage your hair, it's a fact if you have pre dyed hair than you are going to have to use strong methods to remove it. If you are that worried than I strongly recommend you go to a salon and let them do it for you. If your like me and are not worried than go for it (after all it's at the end so you can always trim it, if it gets that bad).
  •  If you are really, really scare of hair damage than check out my guide to dip dye hair, where I share other non permanent ways of achieving the look. There's nothing wrong with faking it.
  • If it ends up going badly wrong, don't continue cut your lost and go straight to your hairdresser!

My dip dye story: So I wish I had just waited and gone to a hairdresser, it would have cost me less. Taken less time, but no I wanted it now. Anyway like I mentioned I rushed my first lot of bleach and did it while doing my roots, so missed half of it. The colour was brassy, which I actually liked, but I wanted my colour so washed my hair with the sheer blonde toner to correct it and get it lighter.

Than I left it a while, rested my hair and than got a highlighter kit to do my second lot of bleach. Bit mistake, as my hair is long and I want most of the bottom there just wasn't enough in the pack! Big fail, still it did lighten some bits. So again I rested my hair and thought of stripping it (finally), it only got out a little colour. 

Fed up I just dyed it with the directions (you can use a semi permanent dye after Colour B4 right away, but not bleach) it did dye some of my hair and I have the start of dip dye hair. I wanted minty colour so mixed the turquoise dye with conditioner, but I should have just put it on neat and let it fade! So now I have the start of my dip dye hair, I'm leaving it 4 weeks, bleaching and than colouring with the directions again. I will let you know if I finally get the colour I want.

(sorry this is long, but I wanted to let you know, rather than skimming important information. Please read directs for anything you use on your hair and follow them, I really hope this helps you). If you have ANY question comment or tweet me @law1sfab)


My dip dyed hair

Update: I re-bleached my hair and re-coloured it and I'm much happier with the results:

 Another Update: I give my hair a trim, and changed the colour the fade on this shade is not as bad as the teal/blue colour.


11